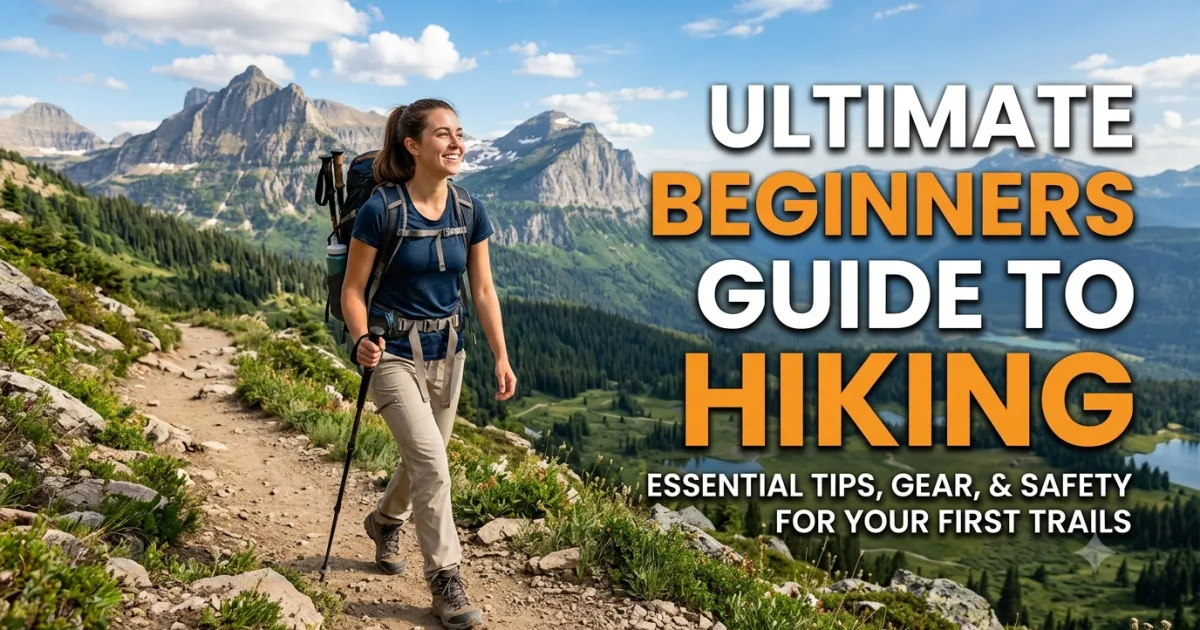
The Day I Showed Up to a Trail in Khakis
I want to tell you about my first real hike, because it's instructive in the worst possible way.
It was a Saturday morning in late spring. A friend had suggested we do a "short hike" in the mountains — maybe five miles, nothing crazy, bring some water. I wore khaki pants. I brought a single 16-ounce bottle of Dasani. I wore running shoes that had about 400 miles on them and were roughly the structural integrity of wet paper. I didn't look at a map. I didn't tell anyone where we were going. I ate a granola bar in the car and considered that adequate nutrition for what turned out to be seven miles of climbing.
We survived. Barely. I cramped somewhere around mile five, developed a blister the size of a small country on my left heel, and spent the next two days walking like I'd just learned how legs work. But I also saw something that afternoon — a view from a ridgeline at golden hour, mountains folding away in every direction, the valley below catching the light like something from a movie — that rewired something in my brain permanently.
I was hooked. I just needed to get way less stupid about it.
That's what this guide is. Everything I wish someone had handed me before that first hike. Not the intimidating gear-junkie version with $800 boots and a 40-point checklist for every microclimate. The real version — what you actually need, what actually matters, and how to walk out of the woods feeling like a person who might want to do this again.
Because here's the thing about hiking: it is genuinely one of the most accessible, most rewarding, most endorphin-positive things a human being can do, and most people never start because they think it's more complicated than it is. It's not. You can do this. Let's talk about how.
What Hiking Actually Is (And Isn't)
Let's get the obvious out of the way: hiking is walking. That's it. It's walking outside, usually on a trail, often uphill, sometimes with a pack on your back. There is no minimum fitness level required to start. There is no membership to buy. You do not need to have previously summited anything. If you can walk to your car, you can hike.
What makes hiking different from a walk around your neighborhood is the environment. Trails are uneven. The ground changes. There's elevation gain — sometimes dramatic, sometimes gentle. You're navigating nature, which means dealing with weather, wildlife, and terrain that doesn't have a maintenance crew leveling it for you. That variability is exactly what makes it interesting, and it's also why preparation matters more than it does for a stroll around the block.
Hiking is also not a race. This trips up a lot of people who come from a running or gym background. There is no pace you need to maintain. There is no rep count. The goal is to move through a beautiful place, take it in, and get back to the trailhead safely. Some of the most experienced hikers I've ever met are also some of the slowest — because they've learned that the point is the trail, not the time.
One more thing: hiking exists on a massive spectrum. A one-mile nature walk on a paved path is hiking. So is a 26-mile backcountry traverse above the treeline. Beginners belong on the easy end of that spectrum, and that's not a limitation — it's just where the story starts.
The 5 Biggest Mistakes Beginners Make
I've made all of these. Learn from my suffering.
1. Choosing Too Hard a Trail
The number one reason people have a bad first hiking experience — or a dangerous one — is picking a trail that's too ambitious. The instinct to challenge yourself is great; the timing of it is wrong. A five-mile trail with 2,000 feet of elevation gain is not a beginner hike, even if it says "moderate" on the app. Start with trails under three miles and under 500 feet of elevation gain. Build from there. Peaks and long ridgelines will still be there in six months when you're ready.
2. Wearing the Wrong Footwear
I see this every time I'm on a trail: someone in flip-flops, flat sneakers, or fashion shoes picking their way across rocks and roots with the look of a person deeply regretting their choices. Your feet are your most important piece of gear. Trail runners or hiking boots with grip are not optional for anything beyond a paved nature path. More on this shortly.
3. Not Bringing Enough Water
A standard recommendation is half a liter of water per hour of hiking, more in heat or at altitude. Most beginners bring one bottle and think that's fine. It is not fine. Dehydration is the fastest route from "I'm having a great time" to "I think something is wrong with me." Two liters minimum for a half-day hike. More if it's hot.
4. Starting Too Late in the Day
Trails are busy and safe in the morning. They get complicated in the afternoon — afternoon thunderstorms are common in the mountains, the temperature swings, and darkness comes faster than you expect. Most experienced hikers are done by 2 PM. Plan to be back at the trailhead well before sunset. A good rule: start time plus expected hike time should put you done by early afternoon.
5. Not Telling Anyone Where You're Going
This is the one that scares me the most to even write. Every year, hikers get hurt or lost — and search and rescue teams are delayed because nobody knew where to look. Before every hike, tell a specific person: what trail you're going to, where the trailhead is, how long you expect to be out, and what to do if you're not back by a certain time. This costs you two minutes and could save your life.
Essential Gear: What You Actually Need to Buy
Here is the good news: you do not need to spend a fortune before your first hike. Here is the better news: the gear that actually matters is simpler than the outdoor industry would like you to believe. Let's work through it from the ground up.
Footwear: The Only Thing You Shouldn't Cheap Out On
If you're going to invest in exactly one piece of hiking gear, make it your shoes. Everything else can be improvised. Footwear cannot.
You have two good options: trail running shoes or hiking boots. Trail runners are lighter, break in faster, and are excellent for day hikes on established trails. They look like running shoes but have a more aggressive outsole grip pattern for traction on dirt and rock. Brands like Salomon, Brooks Cascadia, Altra Lone Peak, and Hoka Speedgoat are consistently well-reviewed.
Hiking boots offer more ankle support and durability, which matters on longer, rougher terrain and when you're carrying a heavier pack. They take longer to break in — wear them around the house and on short walks before you take them on a real trail. Good entry-level hiking boot brands include Merrell, Keen, Columbia, and Oboz.
What you're looking for in either case: a grippy rubber outsole (Vibram is the gold standard), a secure heel fit that doesn't slip, and a toe box that doesn't compress your feet. Visit a local outdoor gear store if you can — the staff can watch you walk and help you find the right fit, and fit matters enormously with hiking footwear.
One often-overlooked partner to good shoes: hiking socks. Wool or synthetic, not cotton. Merino wool socks (Darn Tough, Smartwool, Farm to Feet) regulate temperature, resist odor, and dramatically reduce blister risk. This is a $20-25 purchase that will change your hiking life.
Clothing: The Layer System
The single most important concept in outdoor clothing is layers. Not because outdoor people are obsessive about fashion, but because trail conditions change — sometimes dramatically and quickly — and layers let you adapt without carrying a suitcase.
The classic three-layer system:
Base layer (next to skin): Moisture-wicking fabric that pulls sweat away from your body. Merino wool or synthetic. Never cotton — cotton holds moisture, gets heavy, chafes, and in cold conditions can contribute to hypothermia. This is where "cotton kills" comes from in wilderness circles. It's a slight exaggeration, but on a cold wet day, it's not.
Mid layer (insulation): Fleece or a light down jacket. This is your warmth layer when temperatures drop or the wind picks up. It goes over the base layer and under your shell. On warm days you might not need this at all; stuff it in your pack just in case.
Outer layer (shell): A waterproof or water-resistant jacket that blocks wind and rain. This doesn't need to be expensive — a simple rain shell from REI, Columbia, or Marmot works perfectly for day hiking. Waterproofing degrades over time; reapply DWR treatment annually.
For your lower body on a day hike: hiking pants or shorts (synthetic or nylon, not denim or cotton), or comfortable athletic pants. Zip-off pants that convert to shorts are deeply unfashionable and genuinely useful.
The Daypack
For day hikes, you want a pack in the 20-30 liter range — big enough to carry water, food, layers, and safety essentials without being so large that you're hauling a house on your back. Look for padded shoulder straps, a hip belt (this transfers weight off your shoulders), and a hydration sleeve if you plan to use a water reservoir.
You don't need an expensive pack to start. Osprey Daylite, REI Flash 22, and Gregory Nano are solid entry-level options in the $60-120 range. Avoid school backpacks — they're not designed for weight distribution on uneven terrain.
The Ten Essentials
The Ten Essentials is a framework developed by The Mountaineers in the 1930s and updated over the decades. It's the list of things that can keep you alive if something goes wrong. For day hiking, you don't need every item in its most elaborate form — but you should have some version of each.
1. Navigation: A trail map (downloaded offline in an app like AllTrails or Gaia GPS before you leave cell service) and the basic knowledge to use it. Know which direction the trailhead is from any point on the route.
2. Sun protection: Sunscreen SPF 30 or higher, a hat with a brim, and sunglasses. Elevation amplifies UV exposure significantly — at 10,000 feet you're receiving roughly 25% more UV radiation than at sea level.
3. Insulation: Extra layers beyond what you're wearing. Weather changes. Afternoon thunderstorms can drop temperatures 20-30 degrees in 30 minutes in the mountains.
4. Illumination: A headlamp (not just your phone flashlight — batteries die). Even on a day hike, bring one. Hikes take longer than planned. Darkness comes faster than expected.
5. First-aid supplies: A basic kit: adhesive bandages in multiple sizes, moleskin or blister pads, antiseptic wipes, pain reliever, any personal medications. Pre-assembled kits from Adventure Medical are excellent and compact.
6. Fire: A lighter and waterproof matches. Emergency use only. Know local fire restrictions before lighting anything.
7. Repair tools and knife: A multitool or pocket knife and some duct tape (wrap a few feet around a water bottle — takes no space). Gear breaks. Duct tape fixes everything.
8. Nutrition: Extra food beyond what you plan to eat. If the hike takes longer or something goes wrong, you want fuel in reserve. Trail mix, energy bars, jerky, cheese — calorie-dense, doesn't require cooking.
9. Hydration: More water than you think you need, plus a way to filter or purify water if available (a Sawyer Squeeze filter costs $30 and fits in your pocket). On shorter day hikes in areas with reliable facilities, extra water bottles are sufficient.
10. Emergency shelter: A space blanket (weighs almost nothing, can reflect 90% of body heat) or a lightweight bivy. If you get injured and have to spend an unexpected night out, this can be lifesaving.
For most beginner day hikes, a compressed version of this list fits in a small pouch and weighs under two pounds. Carry it every time. Every time.
How to Choose Your First Trail
This decision matters more than almost any other. A well-matched first trail builds confidence and gets you hooked. A trail that's too hard or too confusing can put people off hiking for years. Here's how to find the right one.
Use a Trail App
AllTrails is the most beginner-friendly option. It has a massive database of trails with ratings, reviews, photos, and difficulty levels. Download it, create a free account, and search for trails near you. Filter for "easy" and under 3 miles to start. Read recent reviews — they'll tell you about current conditions, trail quality, and whether the difficulty rating is accurate.
Gaia GPS is another excellent option, particularly if you'll be in areas without cell service. It allows you to download detailed topographic maps for offline use.
Understand Trail Ratings
Trail difficulty ratings vary by platform and by region, and they can be misleading. "Easy" on a western mountain trail might be "moderate" by eastern standards. Use these as rough guides only, and look at the actual numbers: distance and elevation gain tell you more than a label.
For a first hike, aim for: under 4 miles round trip, under 500 feet of elevation gain. This is genuinely enjoyable and genuinely achievable for almost any fitness level. It lets you focus on the experience rather than survival.
Elevation gain is the metric beginners underestimate most. Two miles with 1,000 feet of gain is not the same as two miles flat. Climbing is exponentially harder than flat walking, and it takes time to calibrate your expectations. The general rule of thumb: add an hour for every 1,000 feet of elevation gain to your time estimate.
Know the Trail Type
Out-and-back: You hike to a destination and return the same way. Great for beginners — if you're struggling, you turn around. Navigation is simple.
Loop: A circuit that returns to the starting point via a different route. More variety, but you're committed once you start. Confirm the whole loop is within your capability before starting.
Point-to-point: Starts in one place and ends in another. Requires a shuttle or two cars. Not ideal for beginners.
Check Conditions Before You Go
Visit the land management agency's website (National Park Service, Forest Service, Bureau of Land Management) for your chosen trail before heading out. Check for trail closures, fire restrictions, permit requirements, and recent conditions. AllTrails reviews will often note if a trail is snowed in, flooded, or has a washed-out section.
Preparing Your Body: You Don't Need to Be "In Shape" to Start
I want to be very clear about this: you do not need to achieve some minimum fitness level before you go hiking. Starting IS the training. Every hike makes the next one easier.
That said, a few things you can do in the weeks before your first hike to make it go better:
Walk more. Obvious, but effective. If your first hike is going to be 4 miles, you want 4 miles of walking to feel manageable. Add a 30-minute walk to your daily routine. Take stairs instead of elevators. The specific muscles you use on trail are the same ones you use walking uphill, so find some hills if you can.
Wear your boots. If you bought new hiking boots, wear them around the house, to the grocery store, on short walks — everywhere — for two weeks before your first trail. Unbroken boots on a long hike will destroy your feet.
Practice carrying your pack. Load your daypack with everything you'll bring and walk around the block with it. This sounds silly but will immediately reveal whether your shoulder straps are adjusted correctly, whether you need to redistribute weight, and whether your hip belt is positioned properly (it should sit on your hip bones, not your waist).
Stretch your calves and hamstrings. Downhill hiking in particular hammers your quads and puts stress on your calves. Five minutes of stretching each morning in the week before a hike makes a measurable difference in next-day soreness.
You don't need a training program. You need to move your body more than you currently do, and then go do the hike.
On the Trail: What to Actually Do
You're there. Boots on, pack loaded, trail ahead. Here's what the first hour looks like.
Start Slow — Embarrassingly Slow
The single most common beginner mistake on trail is going out too fast. You feel good, the air is fresh, the scenery is exciting — you want to move. Resist this. The pace that feels sustainable for the first mile will destroy you by mile three if it's too fast for the terrain and elevation.
A useful test: hike at a pace where you can hold a full conversation without pausing to breathe. If you can't talk, you're going too fast. This feels ridiculously slow at first. It is also exactly right. Experienced hikers call this "conversational pace" and it's how they cover 15 miles without collapsing.
The first 15-20 minutes of any hike, your body is adjusting — heart rate coming up, muscles warming, lungs calibrating to the effort. This is the hardest part of most hikes, and beginners often mistake it for a sign that the whole hike is going to feel like this. It won't. Push through the first 20 minutes at a controlled pace and it almost always gets easier.
The Turn-Around Rule
This is the most important safety rule in day hiking: your turn-around time is not optional.
Before you start, pick a time — say, noon if you started at 8 AM — at which you will turn around and head back regardless of where you are on the trail. Most beginners underestimate return time because they assume going back is faster. Sometimes it is. Sometimes you're more tired, conditions have changed, or the downhill is harder on your knees than expected. Plan conservatively.
The summit or the viewpoint or the waterfall will still be there next time. Getting caught in the dark because you pushed past your turn-around time is not a fun story to tell — and it's a frequently preventable one.
Rest Breaks: Take Them
Every 30-45 minutes, stop for 5-10 minutes. Drink water. Eat a snack. Look around. Rest breaks aren't a sign of weakness — they're how experienced hikers maintain consistent energy across long distances. Take your pack off, let your shoulders recover, and eat something even if you're not hungry yet. By the time you feel hungry on trail, you've already waited too long.
Trail Etiquette
A few rules that make trails work for everyone:
Uphill hikers have right of way. If someone is coming up a steep section toward you and you're heading down, step aside and let them pass. Climbing requires momentum; stopping and restarting is harder than it looks.
Yield to horses and other pack animals — always. Move off the trail on the downhill side, speak calmly, and wait until they pass.
Step off the trail to let faster hikers pass. If someone is moving faster than you, pull to one side and let them by. Don't make them hike through brush.
Keep voices at a reasonable volume. Not because you have to be silent, but because a large part of what people come to trails for is the absence of noise pollution. You don't need to whisper; you don't need to project.
Dogs on leash where required. Check the rules for your specific trail. Many trails require leashes; some don't allow dogs at all.
Food and Water: The Fuel System
Hydration
The rule of thumb is half a liter (about 16 oz) of water per hour of hiking, adjusted upward for heat, altitude, and exertion level. A 3-hour hike on a warm day means you need at least 1.5 liters, probably more. Bring 2 liters and consider it a minimum for anything beyond an hour.
Hydration reservoirs (bladders) like those made by CamelBak or Platypus fit in most daypacks and let you drink without stopping, which means you actually do it more consistently. They come in 1.5L to 3L sizes and cost around $25-50. Alternatively, two 1-liter Nalgene bottles achieve the same thing with more flexibility.
Signs of dehydration: headache, fatigue that seems disproportionate to effort, dark urine, dizziness. Don't wait for these symptoms. Drink proactively, on a schedule — a few sips every 15-20 minutes rather than large amounts all at once.
Electrolytes matter on hikes longer than two hours. Plain water doesn't replace the sodium, potassium, and magnesium you lose through sweat. Nuun tablets (effervescent tabs you drop in your water bottle) are convenient and effective. Sports drinks work too, though they're heavier to carry.
Trail Food
The best trail food is calorie-dense, requires no refrigeration, doesn't need cooking, and doesn't turn into a mess in your pack. Some reliable options:
Trail mix: The original for a reason. Nuts, dried fruit, some chocolate — fat, carbs, and protein in one handful. Make your own or buy it pre-mixed. One cup is about 350-400 calories.
Energy bars: Clif, RX Bar, Larabar, Kind — choose what you actually like. The best trail food is food you'll eat. Bars are lightweight, calorie-dense, and survive pack conditions well.
Jerky and cheese: Protein and fat, both of which sustain energy longer than carbohydrates alone. String cheese and beef jerky are hikers' best friends.
Sandwiches: For hikes of 3-4 hours or more, a real sandwich is worth the weight. Peanut butter holds up best (no refrigeration needed). Eat it at a scenic viewpoint and feel like a genius.
Fresh fruit: Heavier than dried, but nothing beats an orange at 8,000 feet. The payoff-to-effort ratio is unmatched.
Eat something every 60-90 minutes even if you're not hungry. Your body is burning calories continuously on trail, and waiting until you feel depleted means your energy is already flagging. The goal is to stay ahead of hunger, not chase it.
Navigation: Not Getting Lost
Modern trail navigation is significantly easier than it used to be, thanks to GPS-enabled phones and apps like AllTrails and Gaia. But technology has failure modes — batteries die, screens crack, cell service disappears — and every hiker should have basic navigation skills that don't depend on a charged phone.
Download Your Map Before You Leave
This is non-negotiable. In AllTrails (with a paid subscription) or Gaia GPS, download the trail map for offline use before you leave cell service. You can then see your GPS position on the map even without data. This alone prevents the vast majority of beginner navigation problems.
Note: GPS works without cell service — your phone can show your position on a downloaded map with no data connection. The dot on the screen is you. This is genuinely magical and has helped me navigate in the middle of nowhere more times than I can count.
Know Your Trail's Key Features
Before you start: look at the map and identify the major landmarks — where the trail forks, where it crosses a creek, what the highest point looks like, where the parking lot is relative to everything else. Have a mental model of the route before your feet start moving.
Mark the Trailhead
When you arrive, take note of (or pin in your app) exactly where you parked and where the trail starts. In busy national parks and recreation areas, trailheads can be confusing and multiple trails converge in small areas. Know exactly where you need to end up.
When You're Uncertain, Stop
If you're not sure you're on the right trail, stop and check your map rather than continuing and hoping it works out. Trail junctions are where people get lost — a wrong turn at a junction compounds with every step you take. Five minutes of map-checking now is worth hours of backtracking later.
Trail Markers
Most established trails are marked with some combination of: blazes (paint marks on trees), cairns (stacked rocks), wooden or metal signs at junctions, and painted trail markers on rocks. Learn to spot them. If you haven't seen a marker in 10 minutes, you've likely left the trail. Backtrack to the last confirmed marker and reassess.
Weather: Respect It or Suffer
Mountains and forests create their own microclimates, and conditions can change dramatically and quickly. This is one of the places where hiking is genuinely unforgiving of inattention.
Check the Forecast — But Know Its Limits
Check the weather for your specific trail on the morning of your hike. Mountain weather forecasts are available on Weather.gov and can be surprisingly localized. Look for: overall conditions, wind speed, and crucially, the probability of afternoon thunderstorms (which are common in the Rockies, Appalachians, and many mountain ranges from roughly May through September).
Know that forecasts become less reliable as the day goes on. A 20% chance of afternoon thunderstorms sounds low until you're on an exposed ridgeline at 2 PM watching a cell build to the west. Plan to be off exposed terrain — ridgelines, summits, open meadows — before noon in thunderstorm-prone areas.
Lightning: The Non-Negotiable Rule
If you hear thunder, you are within range of lightning — and it's time to move. Get off ridgelines and summits immediately. Get away from tall isolated trees. Get down to lower elevation. If lightning is imminent and you can't find shelter, crouch low (don't lie flat), minimize your contact with the ground, and stay away from other people and metallic objects. Lightning is one of the leading causes of death in the outdoors, and it's almost entirely avoidable with good decision-making.
Cold and Heat
Hypothermia — dangerous drop in core body temperature — doesn't require extreme cold. It can happen at 50°F with wet clothes and wind. Always carry your extra layers. If someone is shivering uncontrollably, confused, or slurring speech, that's a medical emergency — get them into dry, warm clothes and out of the wind immediately.
Heat exhaustion on summer hikes is equally dangerous. Symptoms: heavy sweating, weakness, cold/pale/clammy skin, nausea, fast weak pulse. Treatment: get to shade, hydrate, cool the skin. If it progresses to heat stroke (hot, dry skin, confusion, loss of consciousness), it's a 911 situation.
Both of these are preventable with proper layering, hydration, and starting early enough to avoid afternoon heat.
Wildlife: What to Know and What to Do
Wildlife encounters are one of the things that make hiking spectacular. They're also the thing that inspires a disproportionate amount of fear in first-time hikers. Here's the reality: the vast majority of wildlife encounters are benign, and the rest are almost always avoidable with basic precautions.
Bears
If you're hiking in bear country — and in most of North America, you are — carry bear spray and know how to use it. Bear spray is a capsaicin-based deterrent that is more effective than firearms in stopping bear attacks. It clips to your pack hip belt for fast access.
Make noise while hiking to avoid surprising a bear — talk, clap occasionally, sing embarrassing songs. Most bear encounters happen because a hiker and bear startle each other at close range. Bears want nothing to do with you; give them the chance to leave first.
If you encounter a bear: stay calm, don't run, make yourself big, speak in a firm calm voice, back away slowly. If a black bear charges, fight back — they can be deterred. If a grizzly charges, deploy bear spray; if contact happens, play dead.
Store food properly — in a bear canister, hanging from a tree, or in designated bear boxes at campgrounds. Never eat or store food in your tent. This is basic wildlife etiquette that protects both you and the bear.
Mountain Lions
Encounters are rare. If you see one: don't run (you'll trigger prey drive), make yourself large, maintain eye contact, and back away slowly. If it attacks, fight back with everything you have.
Snakes
Watch where you step and where you put your hands, particularly around rocks, logs, and brush in warm weather. Most snakebites happen when people accidentally step on or handle snakes. If bitten by a rattlesnake (or any snake you can't identify), stay calm, immobilize the bitten area, and get to medical care. Do not cut and suck the wound; do not apply a tourniquet; do not apply ice.
The Animals That Actually Get Most People
Mosquitoes, ticks, and bees. Wear insect repellent containing DEET or picaridin, do a tick check after every hike (focus on hairline, behind knees, armpits), and know your allergy situation before going somewhere remote. An EpiPen if you have bee sting allergies is as essential as any other emergency gear.
Leave No Trace: The Hiker's Code
Leave No Trace (LNT) is a set of principles for minimizing human impact on natural places. It's not a set of rules imposed by bureaucrats — it's common sense for protecting the places you love to visit. The basics:
Pack it in, pack it out. Everything you bring to a trail comes back with you. This includes orange peels, banana peels, apple cores, and any food scraps — none of these are natural to most trail ecosystems and they attract wildlife to human areas.
Stay on trail. Cutting switchbacks and stepping off trail to shortcut damages vegetation and accelerates erosion. The trail exists for a reason — use it.
Leave what you find. Flowers, rocks, feathers, antlers — leave them where you found them. "Take only photos" is the standard for a reason.
Waste disposal. If there are no restrooms and nature calls, go at least 200 feet (70 adult steps) from water, trails, and campsites. Dig a 6-inch cathole, do your business, and bury it. Pack out toilet paper in a zip-lock bag — it does not decompose fast enough to justify leaving it.
Respect wildlife. Don't feed animals. Maintain distance — 100 yards from bears and wolves, 25 yards from other wildlife. Use a long lens if you want to photograph them. Feeding wildlife creates dangerous animals that ultimately have to be destroyed.
Be considerate of others. Keep noise down in wilderness areas, step aside for faster hikers, control your dog, and leave campsites better than you found them.
These aren't onerous. They're just the baseline for not being the reason the place gets fenced off or closed to recreation.
After the Hike: The Part Nobody Talks About
You're back at the car. Everything hurts in new and interesting places. Here's what to do in the next 48 hours.
Rehydrate and Eat a Real Meal
Before you do anything else: drink water and eat something substantial. Trail snacks keep you going; a real meal with protein and carbohydrates is what your muscles need for recovery. The post-hike burger is not just a reward — it's physiologically appropriate.
The Day-After Soreness
Delayed onset muscle soreness (DOMS) peaks 24-48 hours after a hard effort. If your first hike involved significant downhill, your quads will likely protest dramatically on day two. This is normal. Light movement helps — a short walk, some stretching — more than full rest. Ibuprofen or naproxen can help with inflammation; magnesium supplements before bed can reduce cramping.
Check Your Feet
Address any blisters immediately rather than letting them get worse. Clean, drain if needed (with a sterilized needle, leaving the skin intact), apply antibiotic ointment, and cover with moleskin or a blister bandage. Untreated blisters get infected. Infected blisters can end a hiking season.
Process the Experience
Seriously. Take a minute to think about what worked, what didn't, and what you'd do differently. Did you bring too much? Too little? Was the trail harder than expected? Easier? This reflection is how beginners become experienced hikers faster. Write it down if you're the journaling type, or just sit with it on the drive home.
Building Up: Where to Go From Here
You've done your first hike. You're sore, slightly sunburned, possibly blistered, and — if everything went the way it's supposed to — completely certain you want to do it again. Here's how to build from there.
The 10% Rule
Don't increase distance or elevation gain by more than 10-15% per week. This is the same principle used in running training, and it applies equally to hiking. It's not just about fitness — it's about connective tissue adaptation, which takes longer than cardiovascular fitness to develop. Your lungs might be ready for 8 miles before your knees are. Trust the process.
A Reasonable Progression
Month 1: 2-4 mile hikes, minimal elevation. Focus on gear, pacing, and enjoying the experience. Month 2: 4-6 miles, 500-800 feet of gain. Start exploring more varied terrain. Month 3: 6-8 miles, 1,000-1,500 feet of gain. Now you're doing real hiking. Month 6: 10+ mile days, significant elevation. Peaks and ridge traverses become accessible. Year 2: Multi-day backpacking, technical scrambling, high routes. The ceiling has essentially disappeared.
This timeline is approximate and individual — some people progress faster, some slower. Neither is wrong. The only metric that matters is that you keep enjoying it.
Join a Hiking Club or Group
Sierra Club, local hiking clubs, and Meetup groups organize regular group hikes that are explicitly beginner-friendly. Hiking with experienced people accelerates your learning dramatically — you pick up navigation instincts, pacing wisdom, and gear knowledge just by being in the field with people who've been doing it longer. It's also significantly safer than solo hiking for beginners, and most people find it more fun.
Get Into National Parks
America's national park system is one of the genuine wonders of the world, and it's yours. An America the Beautiful annual pass ($80 at time of writing) gets you and everyone in your car into every national park and federal recreation area for a year. Yosemite, Zion, Rocky Mountain, the Smoky Mountains, Acadia — the trail systems in these parks are extensive, well-maintained, well-marked, and designed to take your breath away. Plan a trip. Go.
The Things They Don't Tell You
A few truths about hiking that guidebooks often skip:
The first mile almost always sucks. Your body is warming up, your pack feels heavy, and doubt is loudest at the start. Push through it. Mile two is almost always better.
You will be slower than you think. AllTrails shows an "estimated time" that is routinely optimistic for beginners. Add 30-50% to whatever it says, especially on trails with significant elevation gain, until you have your own pace calibrated.
The summit is not the point. Some of the best moments I've had on trail were on the way up or the way down — a clearing in the trees, a bird I'd never seen before, a stretch of trail so quiet the only sound was my own breathing. Don't make the destination so important that you miss the journey. That is not a motivational poster; it is practical advice.
Bad hikes make better stories than good ones. The time you got rained on, took a wrong turn, developed a blister, and ate a soggy sandwich on a rock in the fog will become your favorite story to tell. There's something about suffering on a beautiful trail that bonds people and burns itself into memory. Embrace the type-2 fun.
You will never be finished learning. I've been hiking for years and I still learn something on almost every trail. New weather patterns, new plants, new navigation situations. The learning is a feature, not a bug. It's what keeps it interesting for decades.
Your First Hike: A Week-Out Checklist
7 days out: Choose your trail. Download the map offline. Check permit requirements.
3 days out: Check gear. Make sure boots are broken in. Confirm pack is packed with all ten essentials.
1 day out: Check weather forecast. Confirm start time. Tell someone your plan (trail name, trailhead location, expected return time).
Morning of: Eat a real breakfast. Fill water bottles (more than you think you need). Check the weather one more time. Start early.
At the trailhead: Note where you parked. Check your GPS is working. Check that your headlamp has batteries. Go.
You're Ready. Go.
I'll end where I started: with me in khaki pants, dehydrated and blistered, watching the last light catch the mountains and thinking I'd never seen anything so beautiful in my life.
The gear was wrong. The preparation was wrong. The trail was probably too long for where I was at. But the experience was right — completely, undeniably right — and that's what I want for you on your first hike.
Not perfection. Not a summit record. Not the best gear or the most scenic trail or the ideal conditions. Just that moment — somewhere on a trail, away from the noise, moving through something that's been there long before you and will be there long after — where you realize this is something you want to keep doing.
Everything else is just logistics. The logistics, you now know.
The rest is just showing up.
Start with a short trail. Wear decent shoes. Bring more water than you think you need. Tell someone where you're going. And then get out there — because the mountains don't care about your preparation level, but they will absolutely reward your effort.
See you on the trail.
Have questions about your first hike? Drop them in the comments below. And if you're ready to find your first trail, use our trail search to find beginner-friendly hikes near you — every trail on this site has a full guide, GPX download, and difficulty rating to help you find the right fit.